Features
Widest cross-browser compatibility The html menus generated by Dreamweaver Menu Extension run perfectly on all old and new browsers, including IE5,6,7,8, Firefox, Opera, Safari and Chrome on PC, Mac, and Linux. Dreamweaver Menu Extension menus have a structure based on HTML list of links (LI and UL tags), readable by any search-engine robots and text browsers.
Rounded Tab Panel Style Menu Examples Search Engine Friendly Dreamweaver Menu Extension generates html code which is transparent to search spiders.
Insertar Un Lbi En Dreamweaver Cs4 Cross Browser Menu Full cross-browser compatibility including IE, Netscape, Mozilla, Opera, Firefox, Konqueror and Safari
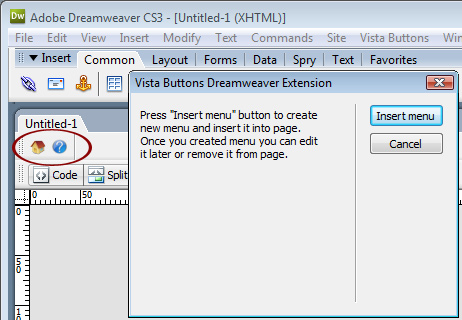
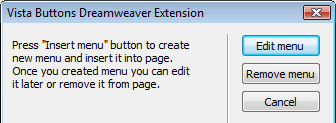
Css Dropdown Menu Generated By Fireworks Dreamweaver Navigation Two Frames Insert button script into the existing HTML page You can insert your button script into the existing HTML page. To do so, click "Page insert" button on the Toolbar.
Orientation of the Menu Create both horizontal and vertical menus and submenus with any amount of menus on one page.
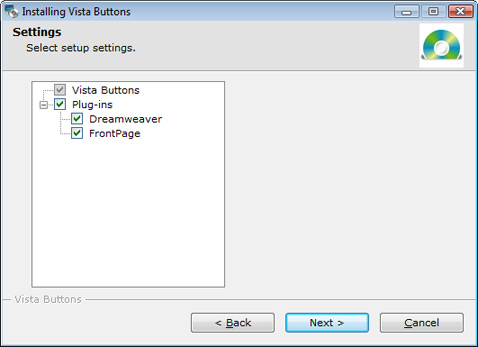
High Quality and Professional Results You don't have to know HTML, JavaScript, CSS or any other coding languages to make multi-state rollover web buttons, professional cross-browser, search engine friendly DHTML menus. All you have to do is make some clicks and adjust buttons as you wish for them to appear. Vista Web Buttons will generate all necessary images, html, javascripts, css styles automatically!
2.0 Buttons by Web-Buttons.com v3.0.0 


 (please include template name in the message title)